
Table of Contents
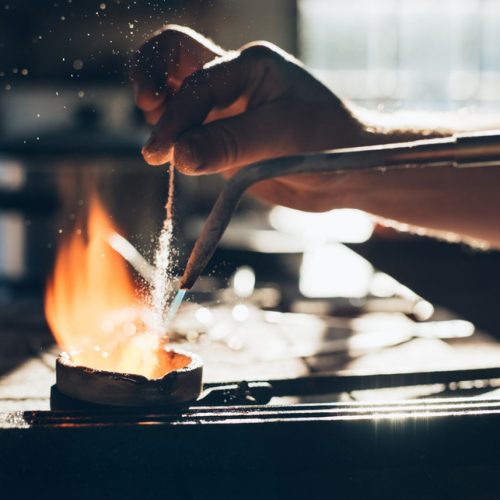
I finally was able to melt some silver, I wrote an article about my journey named My First Pour of Many.
An other article where I describe some of the jargon associated with the stacking community, the article name is Basic information about Silver Stacking.
I have been stacking silver for about two years. I’ve wanted to make my own rounds for a while. When I first started stacking silver, it was about $20 an ounce. Now, it’s almost $30 an ounce.
I am really excited to try this new hobby out. It will allow me to mess with CAD-like programs to design my own rounds, incorporate some science, and maybe even make a little side income. I could make them as gifts for my loved ones.
Currently, I like to stack junk silver, more specifically Franklin Half Dollars. I find Ben Franklin very interesting. It also helps that there were only 465 million Franklin Half Dollars minted between 1948 and 1963 that include 90% silver.
Still, I always check Reddit, APMEX, etc., for interesting-looking rounds. I like rounds that feature images of historic people on them.
What is a silver round?
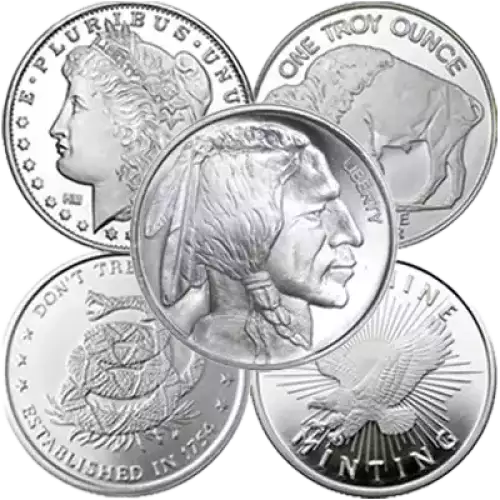
Silver rounds are typically made out of .999 silver and are privately minted. They are also not considered legal tender.
On the other hand, 90% silver, or junk silver, consists of coins minted by a nation that contain 90% silver.
Junk silver is considered legal tender. For example, a Franklin Half Dollar minted before 1964 has a silver content of 90%.
In my journey, I plan on making custom silver rounds. While I am well aware that it is extremely hard to make a profit from casting your own silver rounds and selling them, I am undertaking this journey because of my love for silver and my desire to create special custom rounds.
Safety Safety Safety

Casting your own silver rounds is dangerous. Before embarking on this journey, I spent a couple of weeks learning everything I could about the topic.
I watched YouTube videos, read, and searched for topics on Reddit subreddits like ‘r/silvercasting’ and ‘r/metalcasting.’
I would recommend doing the same thing. Maybe even talk to friends and have them help you. Perhaps your friend will see you do something unsafe, or maybe you’ll notice your friend doing something unsafe—you can monitor each other!
There are a lot of dangers while casting, and there are a couple of types of furnaces that I could use: mainly gas-powered furnaces and electric ones.
I chose to use an electric furnace because I think gas is more dangerous. Plus, I have to deal with additional risks with gas, such as worrying about an open flame and leakage.
When casting your own silver rounds, you will want an open space with good ventilation. You want to keep the work area moisture-free. Not keeping the area moisture-free could lead to an explosion.
There are different types of molds that can be used to cast silver. I chose to use a graphite mold because it gives a cleaner look, can be reused many times, and you don’t have to worry about using sand.
Before pouring the melted silver into the mold, you should use a MAPP torch to heat up the graphite mold.
This will remove any moisture in the mold. Also, do not pour melted silver into a graphite mold on the ground or somewhere wet. It is highly recommended to place the graphite mold on a fireproof stone.
Before pouring or even putting the crucible in the furnace, check the crucible for any defects or cracks. DO NOT USE the crucible if you detect any defects or cracks.
This is dangerous, as it could cause the crucible to break inside the furnace, and the melted silver could leak out and damage the furnace.
I’ve read comments of this happening. The furnace will become unusable if that happens. Additionally, if there’s a defect, it could cause an explosion, break apart, or get stuck inside the furnace.
I would also recommend heating the tongs to prevent the cold from hitting the hot crucible, which might cause an explosion.
Please use thick leather gloves when using the tongs and throughout the casting process.
If you decide to use a graphite mold, you will need a CNC machine to carve out the design in the graphite. You can also do this by hand, but either way, please use gloves and a respirator mask.
Graphite is extremely dangerous to inhale or be around. Carving the graphite mold will release graphite particles into the air.
I would recommend buying a relatively inexpensive CNC carver because the graphite particles will eventually ruin the machine, and you will need to replace it.
I also highly recommend wearing safety goggles and/or a face shield. This will protect you if hot melted silver explodes or splashes.
This goes without saying, but you should have a fire extinguisher on hand in case of a fire.
Picking a Furnace
Before pulling the trigger on a furnace, I watched a ton of YouTube videos reviewing different brands of furnaces.
I already knew I wanted an electric furnace. I looked at a lot of different furnaces on Amazon and read the reviews. Some of the furnaces had decent reviews but also had a couple of one-star reviews claiming that, after a few uses, the furnace stopped working.
If I was going to spend $100+ on a furnace, I wanted to get a lot of use out of it. Anyways, I learned by watching a lot of YouTube videos and reading comments on Reddit that it didn’t really matter which electric furnace I got because they all came from pretty much the same factory in China, just with a different brand name on them.
The furnace I bought came with basic graphite molds. This was nice because the CNC machine I purchased isn’t arriving until next week.
The furnace is supposed to come this Friday. My plan was to melt down a couple of generic .999 silver bars I have and use the basic graphite mold that was included in the furnace before making my own.
The best part of silver casting is that I could re-melt the silver created by using the basic graphite mold included with the furnace.
I ended up going with a TOAUTO 3KG furnace (The link is not an affiliate link). The price was decent, and I liked that it came with a pair of gloves and a basic graphite mold. The crucible is 3KG, which I thought was a decent size to start with— not too big, not too small.
Location!

The location where you decide to cast the silver is one of the most important aspects of the process.
You want to find somewhere dry and well-ventilated. Sadly, my house doesn’t have a garage, and right now it’s the dead of winter, so finding a dry space is super hard. Luckily, I have a friend’s house where we can do it.
As I mentioned earlier, you’ll want to use fire blocks to place your graphite mold on when pouring the hot, melted silver.
If you’re going to use the furnace on a table, I recommend that it not be a wood table, as wood can be really moist and has the potential to catch fire.
Also, I recommend putting the furnace on a fire block as well. One of the downsides of using an electric furnace is that you need an outlet nearby. I was reading comments on Reddit where someone plugged in the furnace, and the extension cord couldn’t handle it, starting an electric fire.
Picking the type of Mold
While I choose to use a graphite mold to cast my silver rounds because I think they look cleaner and allow you to see more details, not to mention that the graphite mold can be reused many times.
Sand casting is probably the cheapest option, but you have to worry about making pours, and you need an object to put in the sand to create the design.
With this option, you can only use the mold once, but if you have the object to make the mold of, you can make more molds out of sand.
The next option is the lost wax method. In this method, you make a design out of wax, cover it with a plaster-like material, and then heat the mold so the wax melts away. Of course, this means you can only use the mold once.
If you choose the graphite mold, please, for the sake of safety, heat up the graphite mold before pouring. But be careful, as if you heat it too much or for too long, the mold could crack.
Before pouring the hot, melted silver into the mold, make sure there are no cracks or anything wrong with the mold.
You do not want the mold to break or leak hot melted silver onto you or anything around the mold.
You can also buy pre-made graphite molds on Amazon, eBay, and even Etsy. I might buy one from time to time if I see a certain mold that catches my eye.
Picking of CNC Machine
Since I plan on making custom graphite molds, I needed a machine to cut the graphite. While I did find YouTube videos of people making their molds with a variety of tools, ranging from a screwdriver to a grinder, I realized that I have very little artistic skill, and the rounds will look much better if done by a machine.
What is a CNC machine, you might be asking? I had the same question. Well, CNC stands for “Computer Numerical Control.”
Basically, it is a machine that can be used to carve wood, light metals, and even laser engrave soft materials.
During my research, and as mentioned earlier, graphite carving makes a mess and will seriously decrease the lifespan of the CNC.
For this reason, I chose to go with a cheaper model that I could easily replace. Even though I plan on putting plastic bags over some parts of the machine to protect it as much as possible, I’m still unsure how I’ll accomplish this, as I don’t have the machine yet.
Anyways, I ended up going with the 3018-PRO CNC Router DIY Kit (no affiliate link). It cost $199 for the CNC machine.
I also purchased a Clamp Kit that I figured I could use to hold the graphite mold down.
It was really hard choosing a good CNC that balanced its features and the cost. If I was spending a good amount of money, I wanted to make sure it could do what I wanted. I watched endless videos of people using CNC machines, hoping the video owner would link the product they were using. Not a lot of content creators did this, but I eventually ended up with this machine. I checked the reviews for this device and was amazed that it had mostly positive feedback.
Before buying the graphite molds, I wanted to make sure they fit under the CNC machine.
Once I figured that out, I purchased a couple of graphite blocks from Amazon. They arrived pretty quickly, and they cost about $9 for two blocks. I ordered two sets of two blocks.
The cool thing about the CNC machine is that it could also be used for other wood or metal projects.
Designing the graphite molds should be fun. In high school, I took a CAD class, which was really enjoyable. I have yet to mess with the software for the CNC device, but I plan on experimenting with it this weekend when I have time.
Closing Remarks.
When deciding to start casting, make sure that you can lift up to 50 pounds. You will need to use tongs to hold the crucible and other materials.
I will continue to post about my journey in a series of posts and show some of the silver rounds I make. These posts will explain any lessons I learn in this wonderful new hobby.